How To Deploy Headless CMS Strapi On Railway App In 7 Steps
- User Experience

The Railway app has redefined web application deployment, offering developers a seamless experience.
Join Kapsys as we discover how to deploy the headless CMS Strapi on the Railway app efficiently in seven easy steps. This process simplifies your deployment and ensures cost-efficiency and flexibility, making it an ideal choice for hosting Strapi.
This article was researched and written in collaboration with Daria Andrieieva - Kapsys staff content marketing specialist.
What You Need to Know About Strapi and Railway
Strapi, the versatile headless CMS, and the Railway app, a groundbreaking cloud platform, are poised to reshape how you create, manage, and deploy web content and applications.
Discover why this dynamic partnership will become your best choice for upcoming projects.
What is Strapi?
Headless CMS Strapi is an open-source, highly customizable Content Management System that follows the headless architecture.
It provides a backend framework for creating, managing, and delivering content via a RESTful API or GraphQL. Strapi empowers developers to build and maintain content-rich websites and applications with ease.
Read: What Is Strapi, And Why Is It A Leading Headless CMS?
What is Railway App?
The Railway app is a game-changer in cloud platform services. It streamlines the deployment process of web applications and services, making it exceptionally developer-friendly.
It's not just a platform; it's a solution that perfectly integrates with your workflow, especially when hosting a versatile CMS like Strapi.
Railway App is a Platform as a Service (PaaS) designed to streamline the process of building and deploying applications directly to a cloud backend.
With the Railway app, you only need to provide your code; the platform handles everything else. This versatile technology caters to projects of all sizes, from small tasks to large-scale operations.
Furthermore, it offers a flexible user experience by allowing integration with your current repositories and allowing you to start a project from scratch. Recognizing that each project has unique needs, the Railway app offers extensions to enhance your application's functionality.
Each of these platforms offers you freedom and flexibility in future projects. However, the union of these applications will become a true game changer.
Check out the benefits of hosting Strapi on the Railway app in the next section of this blog post.
3 Benefits of Hosting Strapi on Railway App
Combining headless CMS Strapi with the Railway app delivers easy deployment, cost-savings, flexibility, and optimal performance.
Let's explore the advantages of hosting Strapi on the Railway app for top-notch results:
1. Template-based deployment
The Railway app simplifies your deployment process by offering a template-based approach. Here's why this is beneficial:
Reusable templates
Create a single configuration template for your headless CMS Strapi, capturing all the settings and dependencies required for your project. This template can be reused for multiple deployments, saving you time and effort in configuration.
Consistent deployments
Templates ensure that your headless CMS Strapi deployments on the Railway app are standardized and hassle-free. This consistency is crucial, especially when managing multiple projects with different teams.
2. Cost-efficiency
Cost management is a key concern for any project. The Railway app's pricing model is designed with this in mind:
Pay-as-you-go
Pay only for the resources you use when your projects are active on the Railway app. The granular pricing model allows you to scale resources according to your actual usage, preventing overpayment for idle resources.
Optimized costs
With the Railway app, you can quickly scale resources up or down, ensuring that your Strapi CMS aligns with your project's requirements. This optimization minimizes excess costs while maintaining optimal performance.
2. Flexibility and scalability
Flexibility is essential as your project evolves, and the Railway app offers precisely that:
Adaptable infrastructure
You can effortlessly scale resources up or down according to your project's specific needs on the Railway app. This adaptability allows your Strapi CMS to grow with your project.
Optimal performance
The Railway app's infrastructure ensures that your Strapi CMS always performs at its best. This leads to a better user experience and efficient resource utilization.
Prerequisites: What Do You Need Before Starting
Before you start deploying headless CMS Strapi on the Railway app, make sure you have the following prerequisites in place:
A Railway app account: If you haven't already, sign up for a Railway app account. You can do so on their website.
Basic knowledge of Git and GitHub: Familiarize yourself with Git version control and GitHub for seamless project management.
An Amazon S3 account for storage (optional): If you plan to use Amazon S3 for file storage, set up an account and have your credentials ready.
A domain name for your project (optional): If you have a custom domain, keep the domain and its DNS records at hand.
Once we have covered the basics and have prepared, we can move on to the actionable steps. Let's explore them in the next section.
7 Steps To Deploy Strapi on the Railway App Using GitHub
We'll walk you through the seven steps required to seamlessly deploy your Strapi project on the Railway app using your GitHub repository.
Let's explore the process in detail:
Step 1. Create a Strapi project
Start by creating a Strapi project. You can do this using the Strapi CLI or by visiting the Strapi admin panel.
Here, you'll configure your Strapi project according to your unique content needs. If you opt for the CLI method, you can do this by executing the following command:
npx create-strapi-app my-strapi-project --quickstart
Read: How To Customize Strapi CMS: Adding Plugins And Modifying Configurations

Step 2. Initialize a Git repository
To deploy your Strapi project on Railway, you'll need a Git repository. This repository is your version control hub, storing your project's codebase.
To set this up, navigate to your Strapi project's root folder and initialize a Git repository using the following command:
git initStep 3. Create a GitHub repository
Next, you'll need to create a new repository on GitHub to host your Strapi project's codebase. Simply follow GitHub's intuitive instructions to establish this repository.
git remote add origin <GitHub Repository URL>
git push -u origin master
Step 4. Connect Railway app to GitHub
You must log in to your Railway account and connect it to your GitHub repository. The railway automatically detects your Git repository, making the setup process a breeze.
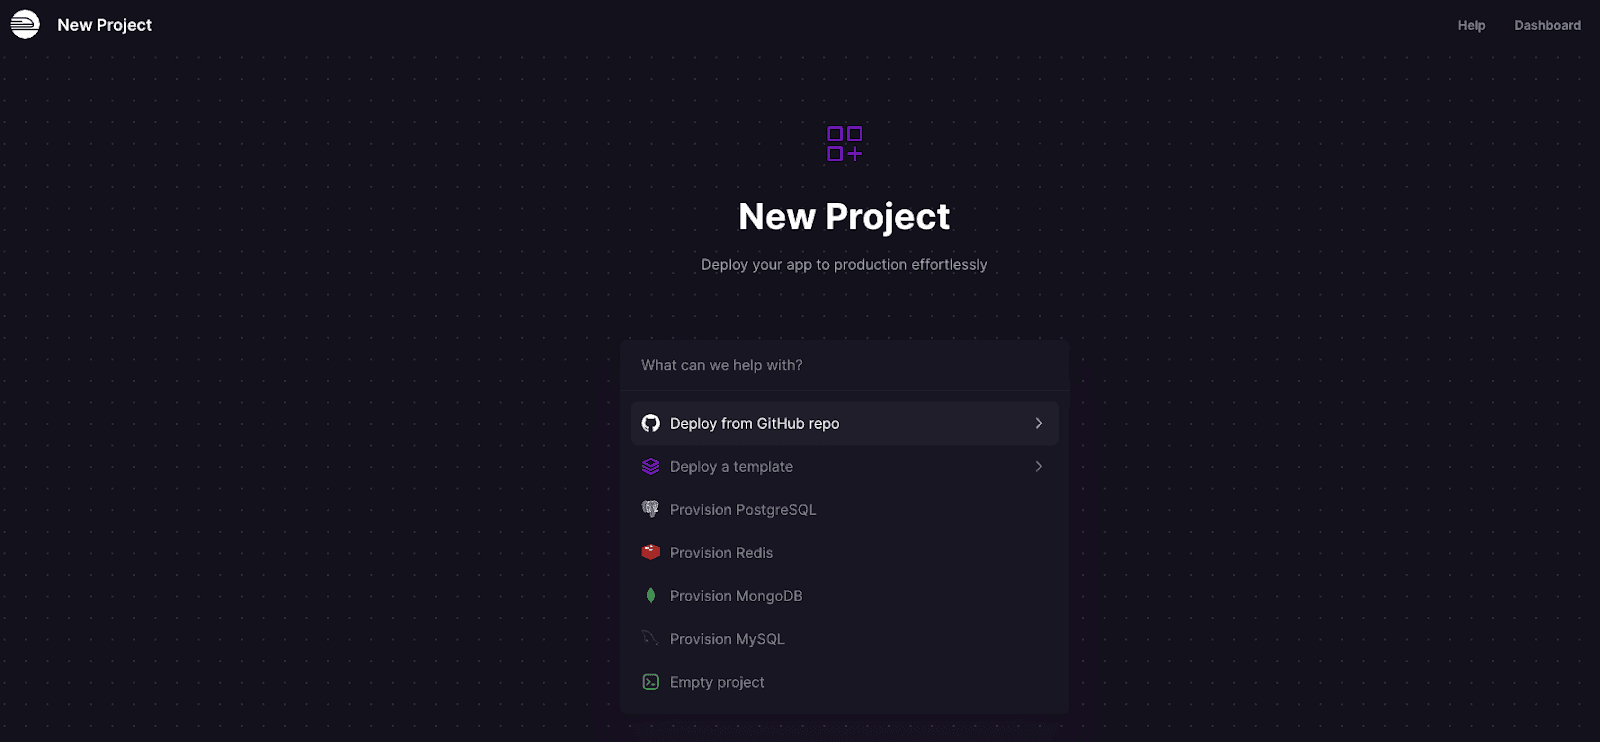
Step 5. Deploy Strapi on Railway app
Now, it's time to deploy your Strapi project. Select the repository and branch you want to deploy in your Railway project. The Railway app takes care of the build and deployment process for you.
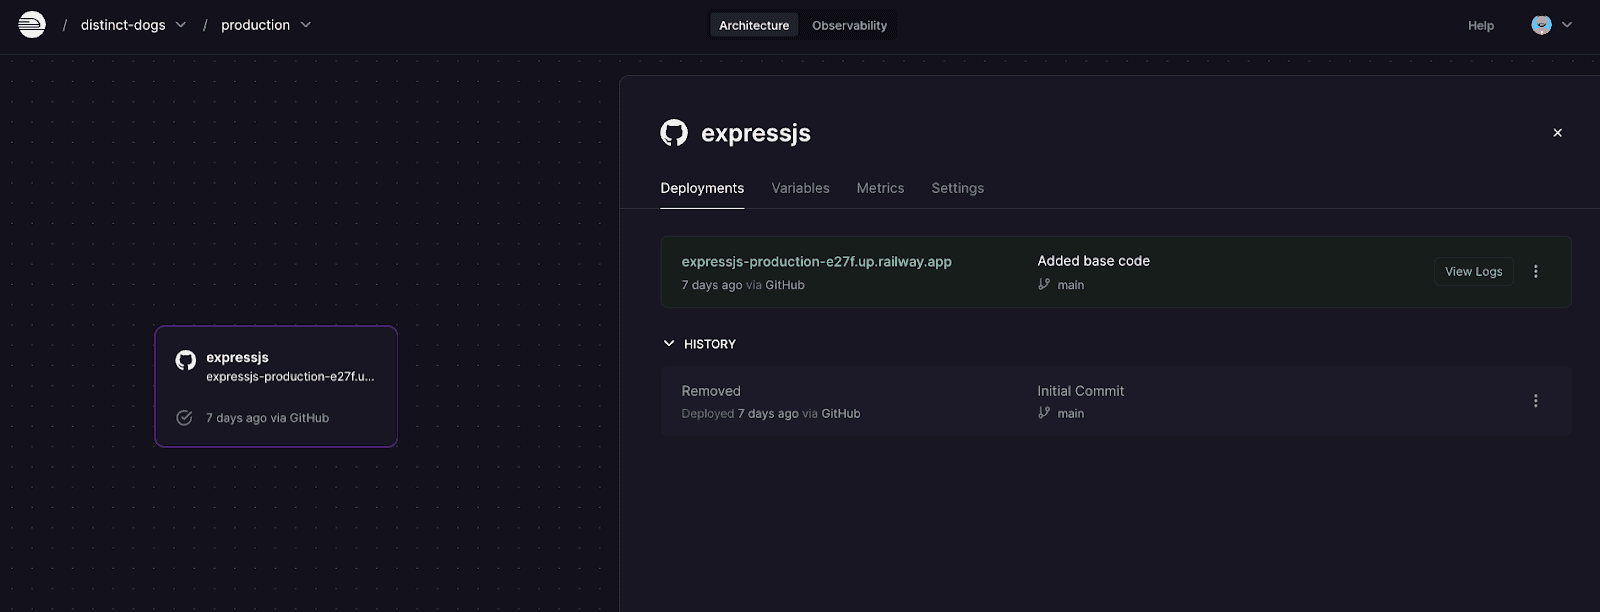
An example of how you might initiate this process is as follows:
# Example of deploying your Strapi project using Railway
# This command might vary depending on your setup
railway up
Step 6. Configure S3 as storage (optional)
If your project requires file storage, especially if you plan to use Amazon S3, you can configure this in your project's settings.
Here, you'll provide your Amazon S3 credentials and configure the necessary settings to enable this feature.
Step 7. Set up a custom domain or use a temporary domain

For the final step, you have two options for managing your project's domain:
Temporary Domain
If you don't have a custom domain, the Railway app provides a temporary domain for your project. This domain is secured with SSL certificates, ensuring a secure connection for your users.
Custom Domain (Using CNAME)
If you possess a custom domain, you can configure it with your Railway app project using a CNAME (Canonical Name) record. Create a CNAME record pointing to your Railway app's temporary domain in your DNS settings, typically something like <your-project-name>.railway.app.
By following these seven concise and clear steps, you can deploy your Strapi project effortlessly on the Railway app, paving the way for a seamless content management experience.
Read: CMS Authentication and Permissions: Setting Up User Roles And Security Measures In Strapi
Troubleshooting
While the Railway app simplifies the deployment process, you might encounter some issues. Here are a few common problems and troubleshooting tips for them:
Check configuration
A simple project configuration can lead to deployment issues.
Solution: Review your Strapi project's configuration and validate paths, environment variables, and database connections. Correct any inaccuracies before deploying.
Repository access
The Railway app's lack of access to your GitHub repository can disrupt deployment. This may occur due to incorrect permissions or settings.
Solution: Ensure the Railway app has the required permissions to access your GitHub repository. Verify settings and access rights on GitHub and adjust them as needed to facilitate a smooth connection.
Domain setup
When using a custom domain, domain setup can be a source of problems. An incorrectly configured CNAME record may result in domain-related errors.
Solution: Validate your domain setup. Confirm that the CNAME record points to your Railway app temporary domain (e.g., <your-project-name>.railway.app). Ensure DNS settings are correct and allow for DNS propagation time if changes were recently made.
Resource scaling
Performance issues can arise if resource allocation isn't appropriately scaled to match the demands of your Strapi project. This can result in lag or downtime.
Solution: If you encounter performance problems, assess your resource allocation on the Railway app. Consider increasing or decreasing resources based on your project's needs. Regularly monitor resource usage to ensure optimal performance.
Implementing these troubleshooting solutions allows you to resolve common deployment issues and maintain a seamless Strapi deployment on the Railway app.
Using Railway Project Templates
Creating templates for your Railway projects is a strategic move that can significantly enhance efficiency for future deployments.
These templates serve as a blueprint for your project configuration, streamlining the setup process and ensuring uniformity across your Strapi projects.
Here's how it works:
Creating the template
To create a template for your Railway project, follow these steps:
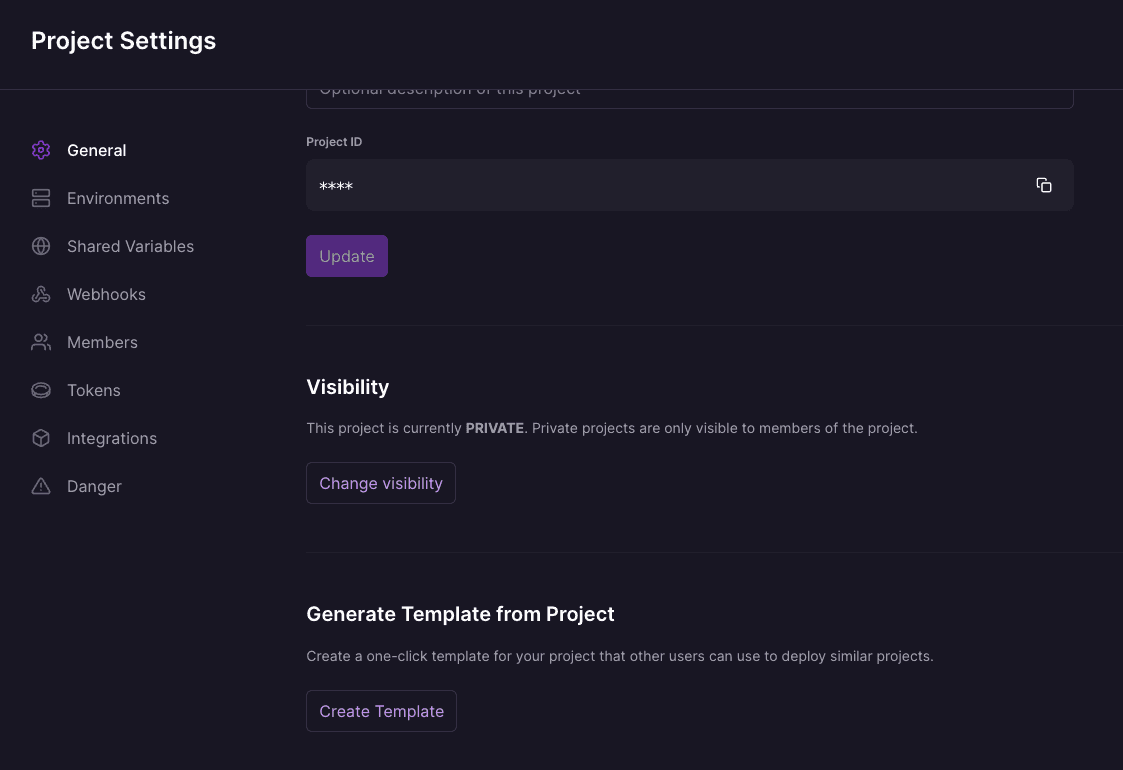
Step 1: Project Configuration: Begin with a well-configured Railway project that meets the requirements of your Strapi project. This includes resource allocation, environment variables, and any custom domain settings.
Step 2: Save as Template: In your Railway app dashboard, look for the option to save the current project as a template. This functionality is designed to capture the project's entire configuration.
Utilizing the template
When you're ready to deploy a new Strapi project, make use of the saved template:
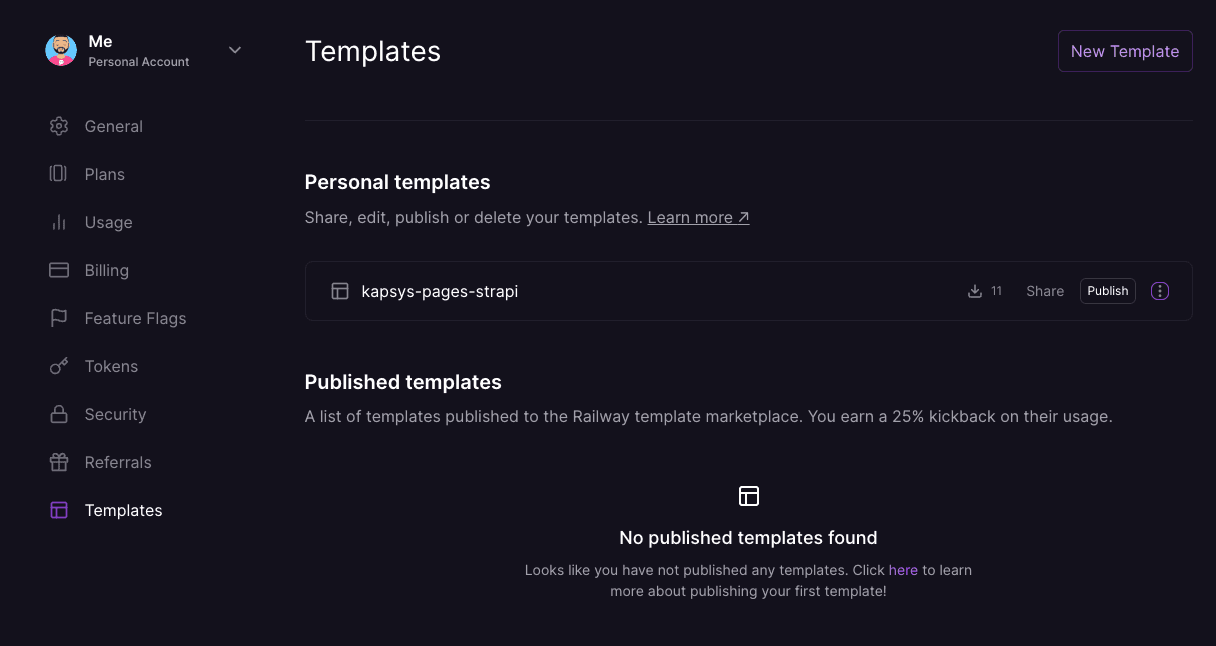
Step 1: Create a New Project: Create a new project within the Railway app. This can be initiated from your dashboard.
Step 2: Select Template: During the project creation process, opt to use a template. This is where you choose the template you've previously saved.
Step 3: Configure as Needed: Customize the project to align with the specific requirements of your new Strapi project. This might include adjusting environment variables or domain settings.
- Step 4: Deploy: Once you've tailored the template to your new Strapi project's needs, proceed with the deployment. The Railway app will handle the build and setup according to the template's configuration.
Benefits of Railway app templates
Here are some advantages of using these templates:
Time Savings: Using templates significantly reduces the time required to set up a new Strapi project. You skip the manual configuration process and instead start from a predefined, well-structured base.
Consistency: Templates ensure that all your Strapi projects adhere to the same standards and configurations. This reduces the risk of errors or inconsistencies across projects.
Efficiency: The efficiency gained from using templates translates to more time available for project development and less onboarding overhead.
Implementing Railway project templates simplifies your deployment process and builds a structured and efficient approach to managing multiple Strapi projects.

Conclusion
Deploying headless CMS Strapi on the Railway app using GitHub is a straightforward and efficient process, allowing you to harness the full potential of a headless CMS while benefiting from
With Strapi's customizable content management and Railway's streamlined deployment, your web projects will be easier to manage and more cost-effective than ever before.
Start deploying your Strapi project on the Railway app today and experience the difference.
Keep up with Kapsys to learn more actionable insights!


