Ultimate Guide To Deploying Monorepo Project On Railway App
- User Experience
In modern software development, efficiency, scalability, and collaboration are key to success. One emerging trend that addresses these needs is the adoption of monorepo.
Join Kapsys as we explore integrating a monorepo structure into the Railway app, a platform known for its simplicity and versatility in web development.
What's a Railway App?
Railway app stands out as a potent platform revolutionizing the deployment and management of web applications. Its strength lies in its seamless integration with many popular frameworks and tools, streamlining the development process.
This integration allows teams to bypass the intricacies of setup and configuration, empowering them to channel their energy towards crafting exceptional user experiences.

Why Railway?
The Railway app goes beyond a standard platform; it's a comprehensive toolkit simplifying web app development and deployment. Here's what it offers:
Excellent choice for educational purposes
The Railway's simplicity makes it perfect for educational purposes, offering students and beginners a platform to experiment, learn, and showcase their skills.
Effortless setup and deployment
Railway app's intuitive interface and robust infrastructure enable developers to focus on coding rather than server configuration or deployment management. This simplicity extends to monorepo integration, ensuring swift project initiation.
Real-world experience
Railway offers students invaluable real-world experience in a professional development environment. Through collaboration, they learn to work with team members, adhere to best practices, and develop skills essential for a successful career in software development.
Collaborative learning
Railway facilitates collaborative learning by providing a shared platform for project collaboration. With built-in version control and seamless deployment workflows, teams can collaborate seamlessly, sharing ideas, troubleshooting issues, and collectively building impressive applications.
Template-based deployment
The Railway app offers template-based deployment, enabling developers to kickstart their projects with pre-configured templates tailored to their needs. This feature improves the development process by providing a solid foundation, allowing teams to focus on customizing and refining their applications rather than starting from scratch.
Cost-efficiency
Railway's pay-as-you-go model ensures that you only pay for the resources you use, making it a cost-effective solution for projects of any scale. Railway's flexible pricing plans adapt to your needs without compromising performance or quality.
What is a Monorepo?
A monorepo is a software development approach where all code for multiple projects or components is stored within a single version control repository. In a Monorepo, code for various applications, libraries, or services coexists in one centralized repository instead of having separate repositories for each project or component.
Benefits of a Monorepo
Now, let's take a closer look at what benefits monorepo can bring to the table:
Simplified dependency management
In a monorepo, all dependencies are managed at the repository level, eliminating the need to duplicate dependencies across multiple projects. This simplifies dependency management, reduces conflicts, and ensures consistency across the codebase.
Streamlined workflow
With all projects housed in a single repository, developers can work more efficiently, leveraging shared code and resources. This streamlined workflow accelerates development cycles, reduces overhead, and promotes code reuse.
Improved collaboration
Monorepo facilitates collaboration by providing a centralized location for all projects. Developers can easily share code, track changes, and collaborate on features, improving team communication and productivity.
Consistency and reusability
By promoting code sharing and standardization, monorepo ensures consistency across projects. Developers can leverage existing code and libraries, reducing duplication and promoting reusability—an essential aspect of scalable and maintainable software.
Also read: How To Build A Simple Blog With Next.js Markdown
Toolkit for Monorepo
Specialized tools are essential for simplifying workflows and boosting productivity in monorepo management. Let's explore two popular tools in this domain:
Lerna
Lerna is tailored to optimize JavaScript project management within monorepo structures. It streamlines package management, versioning, and release processes:
Package Management: Lerna allows developers to organize code into multiple packages within a single repository, offering commands for adding, removing, and managing packages.
Dependency Management: Lerna makes Handling dependencies across packages easier, ensuring proper linking and management to reduce conflicts.
Versioning: Lerna automates package version updates and offers tools for managing versioning strategies and release workflows.
Script Execution: Lerna excels in executing scripts across multiple packages simultaneously, aiding tasks like testing, building, or deploying applications.
Yarn Workspaces
Yarn Workspaces, a core feature of the Yarn package manager, provides native support for managing monorepo:
Dependency Resolution: Yarn Workspaces optimizes dependency resolution by hoisting shared dependencies to the root level of the monorepo, enhancing consistency and build times.
Workspace Management: Treating the entire monorepo as a single workspace, Yarn Workspaces promotes seamless package interaction, fostering code sharing and collaboration.
Package Linking: Like Lerna, Yarn Workspaces facilitates package linking within the monorepo, automatically creating symlinks between dependent packages.
Parallel Installation: Yarn Workspaces employs similar installation to speed up initial setup and subsequent dependency installations, enhancing overall efficiency.
Also read: How To Elevate Your Vercel Monitoring With External Tools
Here's How to Deploy Monorepo on Railway App
Now, as we discussed both Railway App and monorepo in detail, let's explore the steps to streamline your development and deployment workflow:
Step 1. Create a Railway project
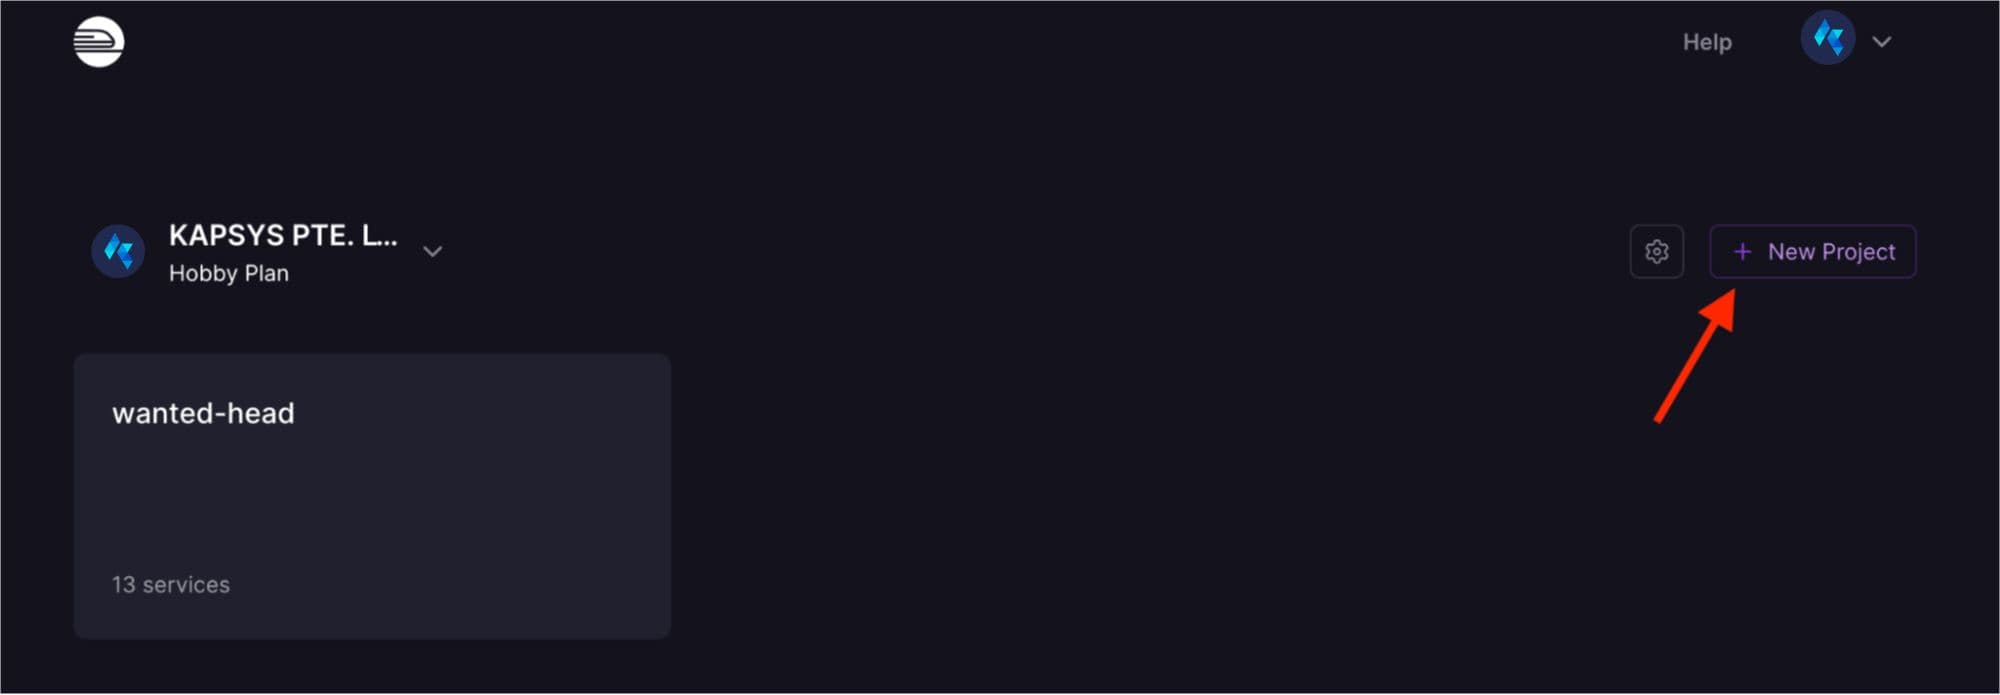
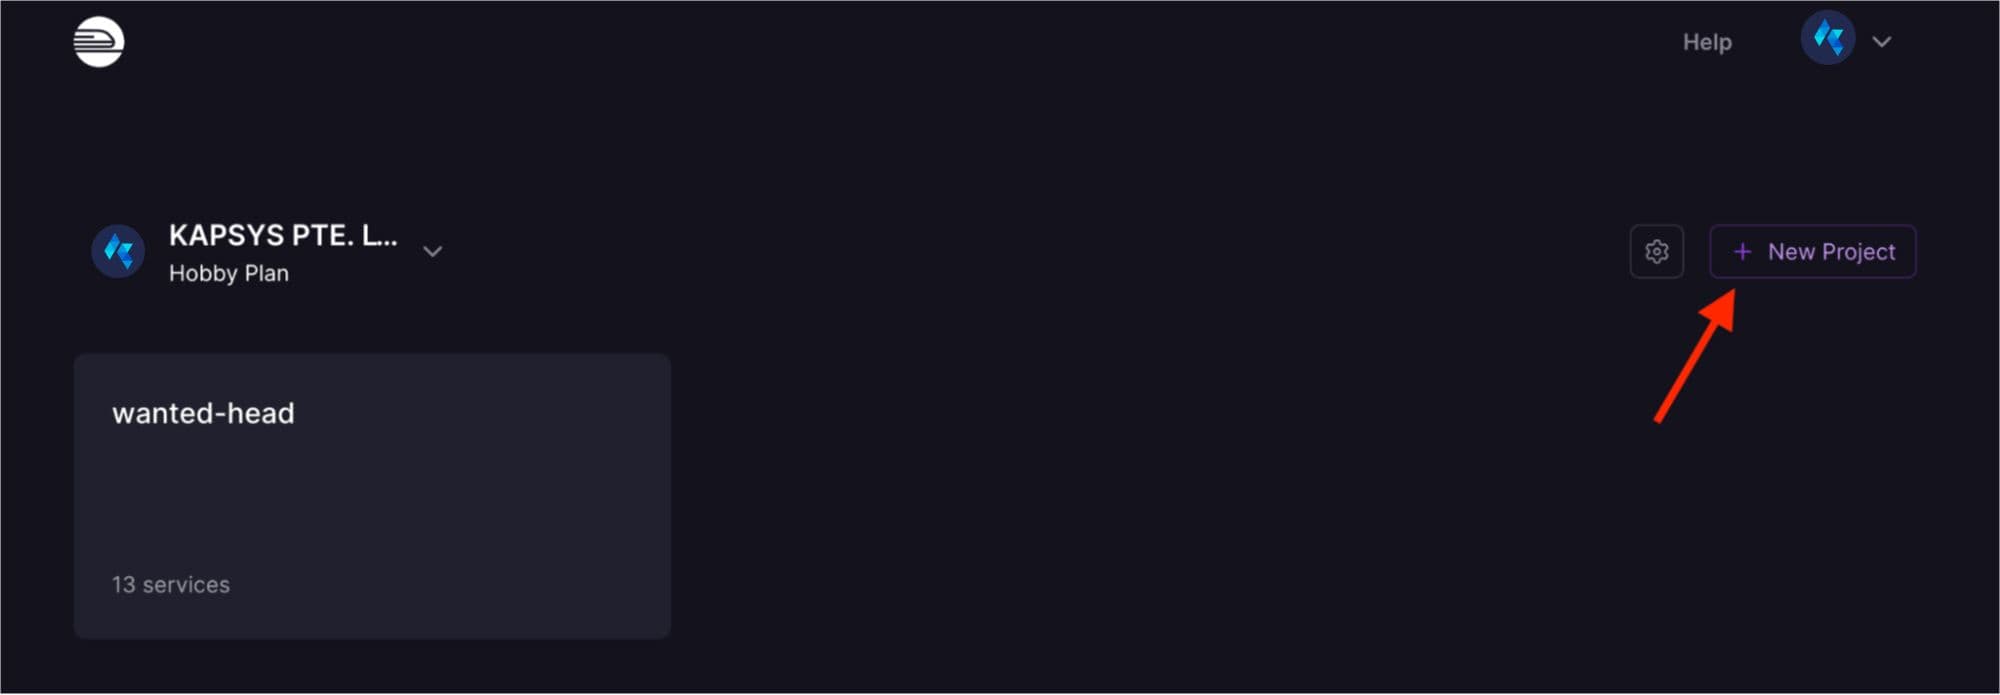
From the dashboard section, click on the New Project button:
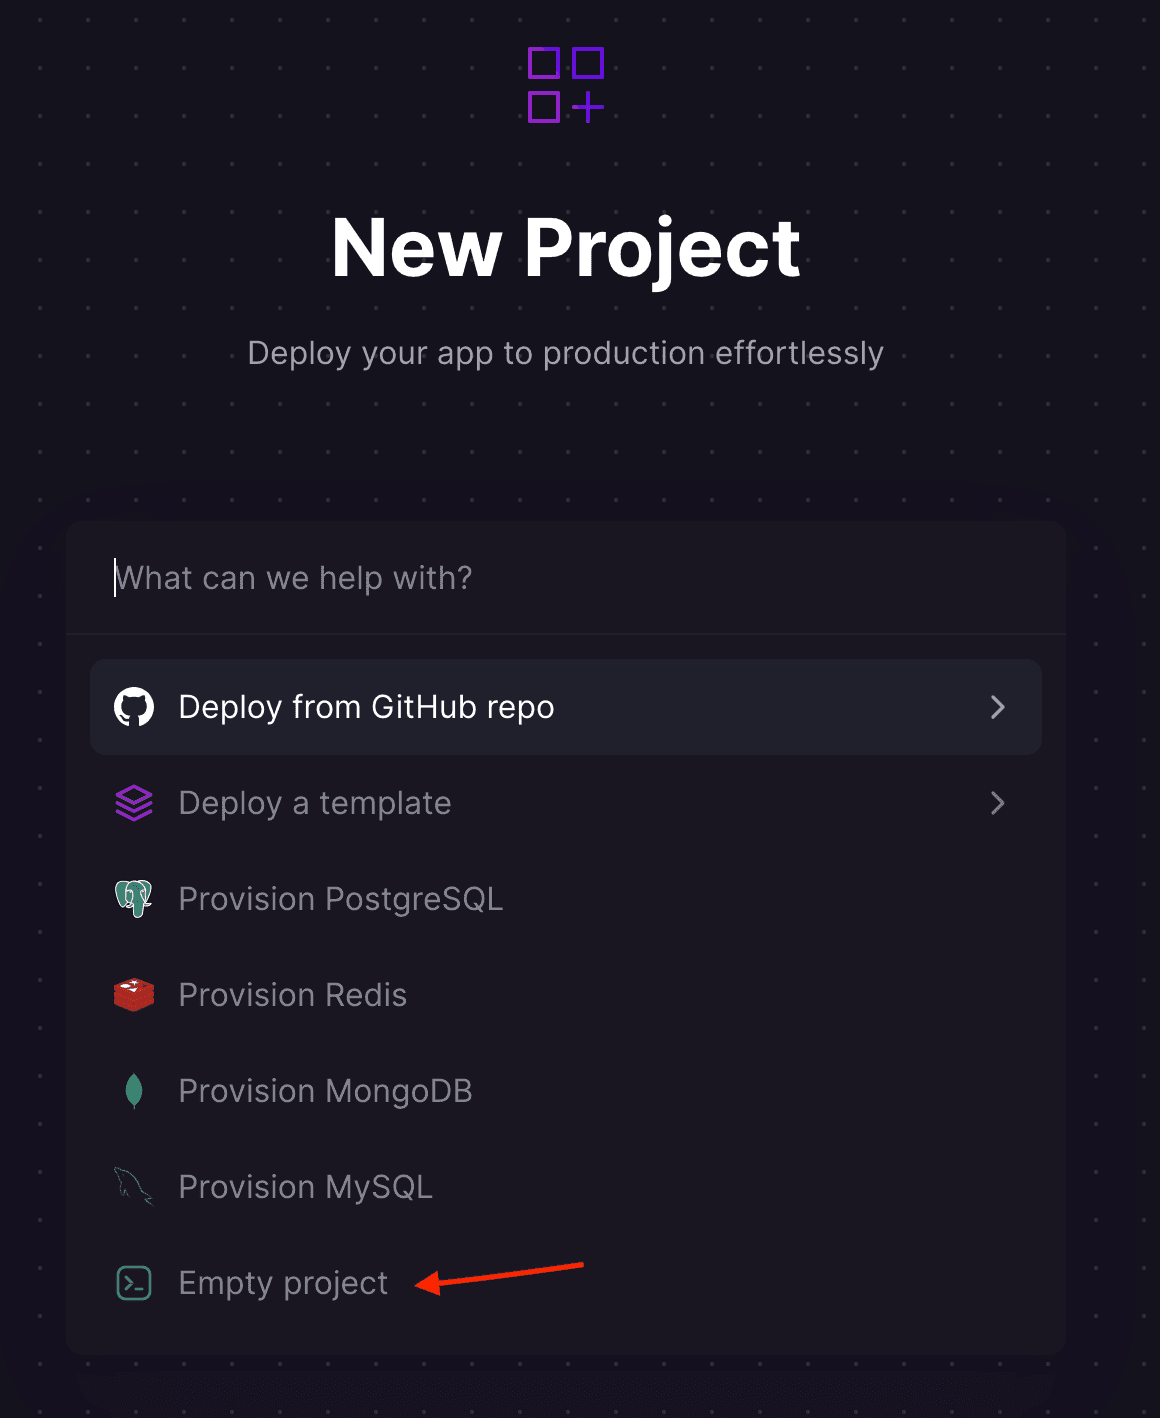
Select the Empty Project option:
Step 2. Create a service per package for the monorepo
Let's take a look at the project structure:
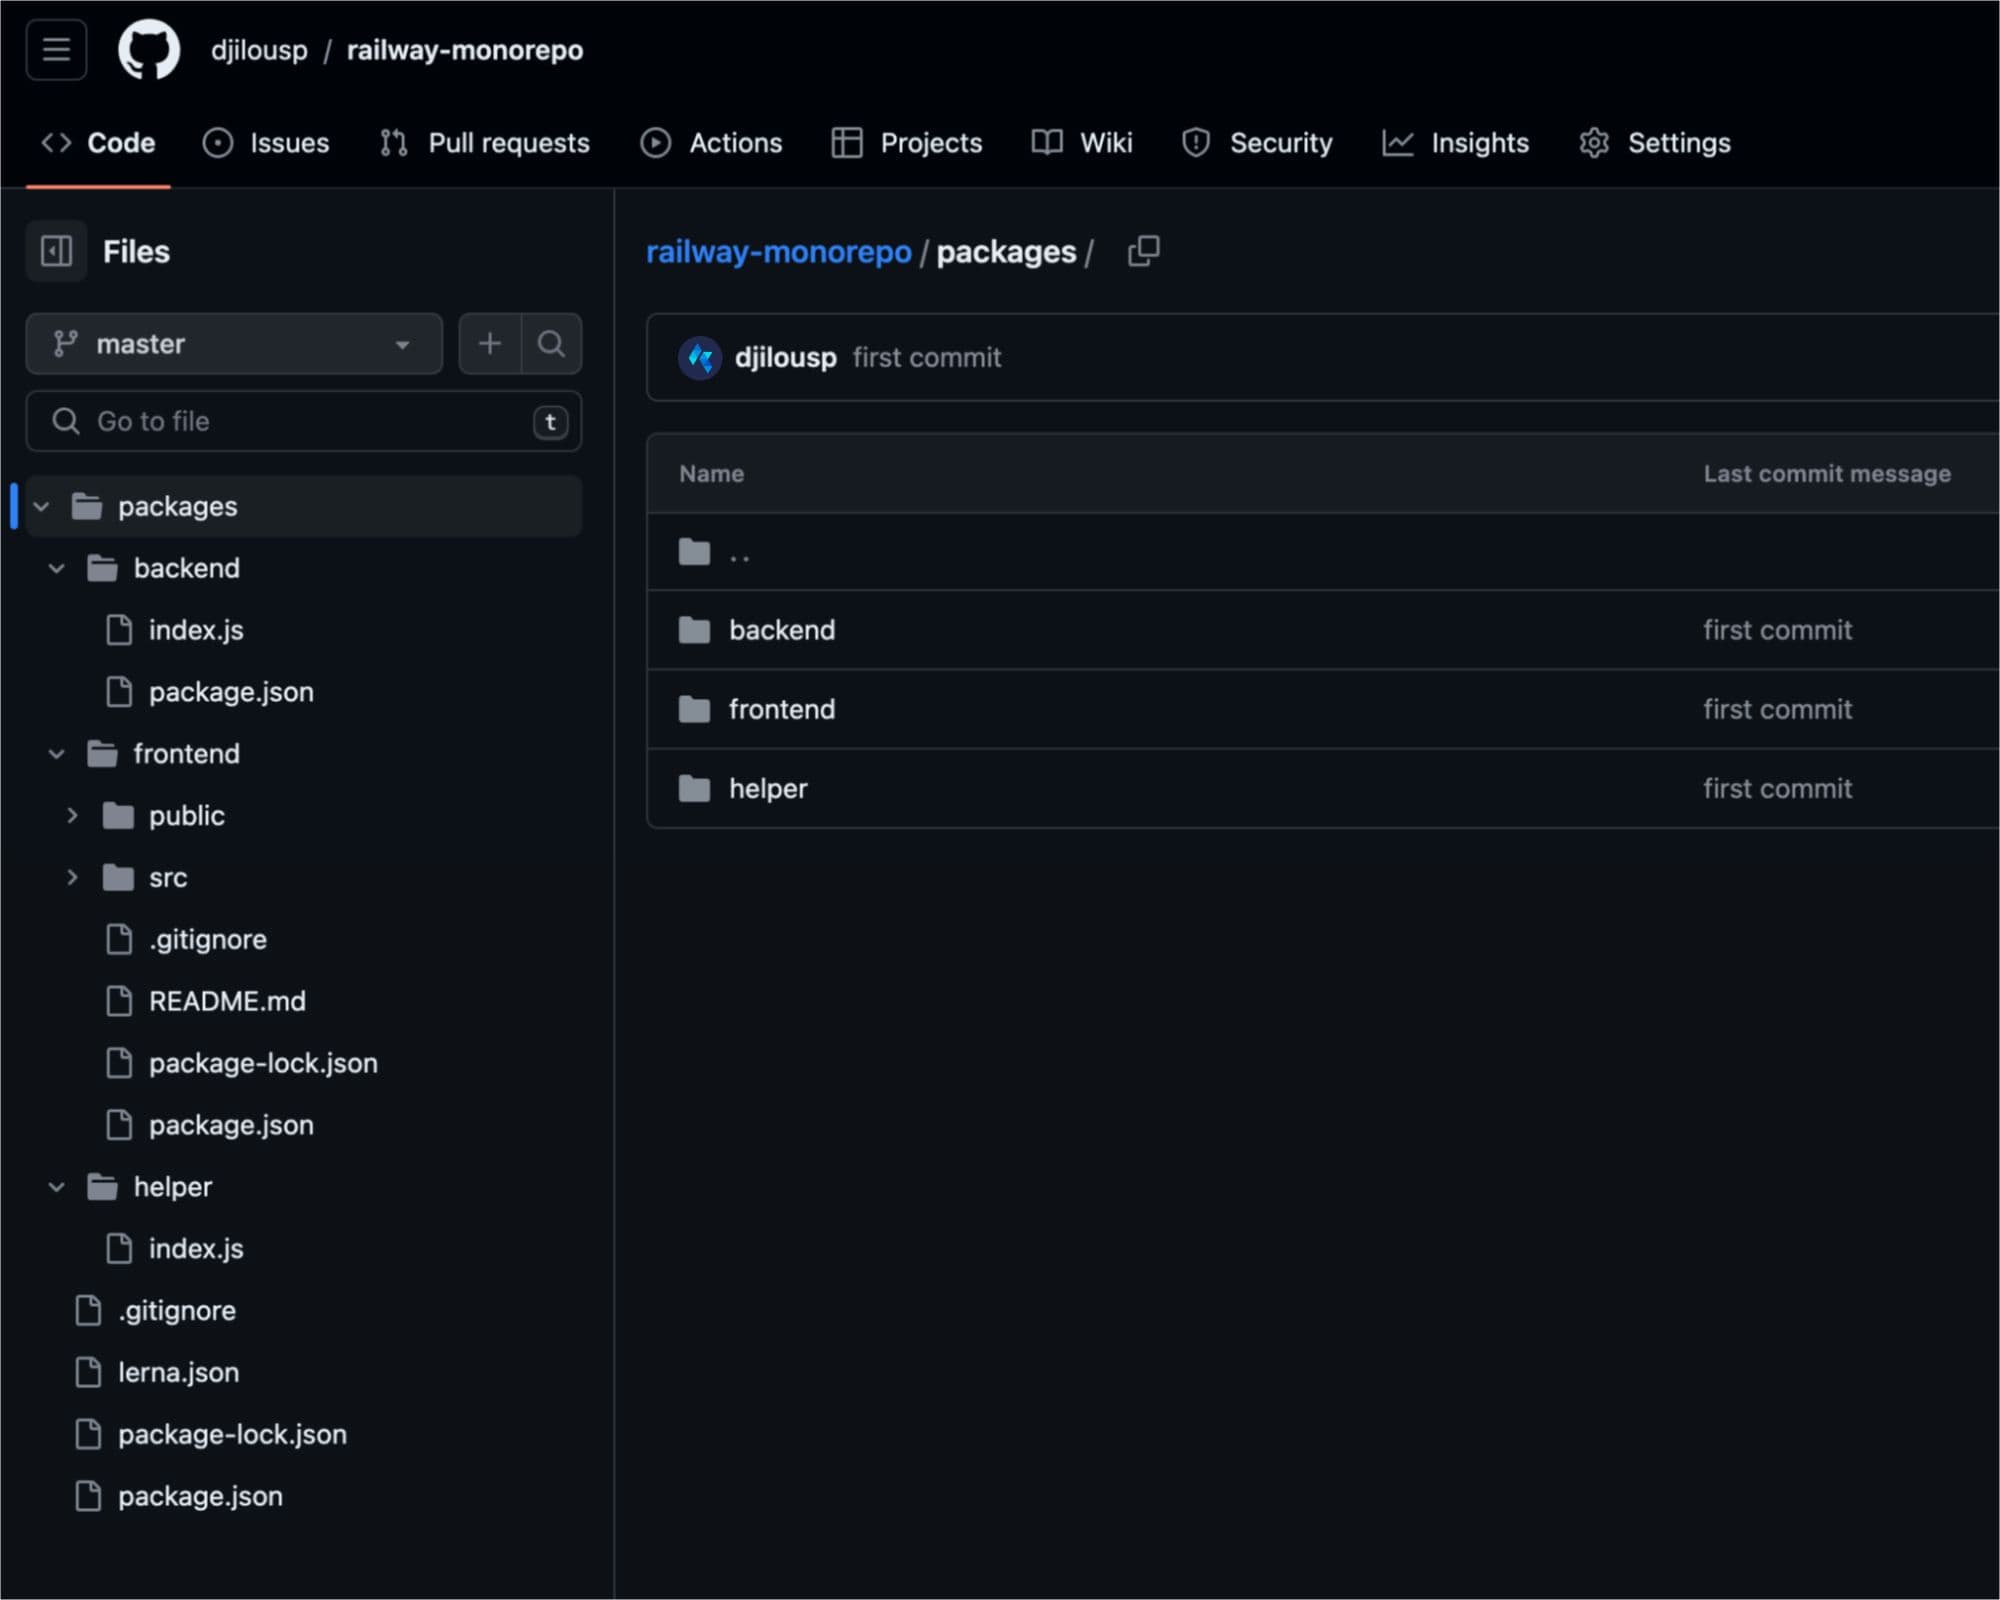
So, as you can see, the project consists of 3 main packages:
backend which is an Express app;
frontend a React.Js application;
the 3rd package is a Helper.
We mainly need to deploy the backend and frontend only, so let's take a closer look at how to do that with monorepo:
2.1 Deploy backend service
From within the empty project we just created, create an empty service.
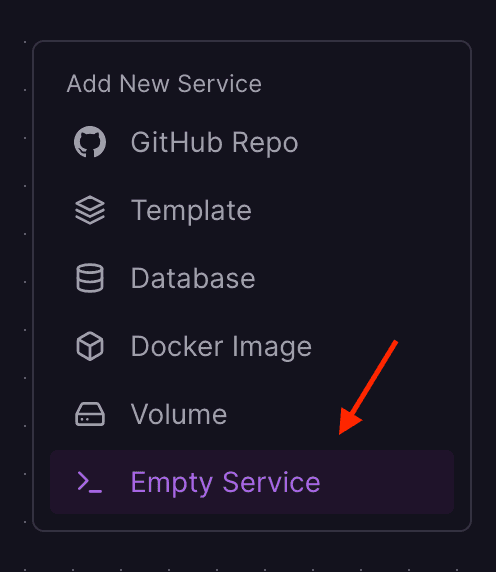
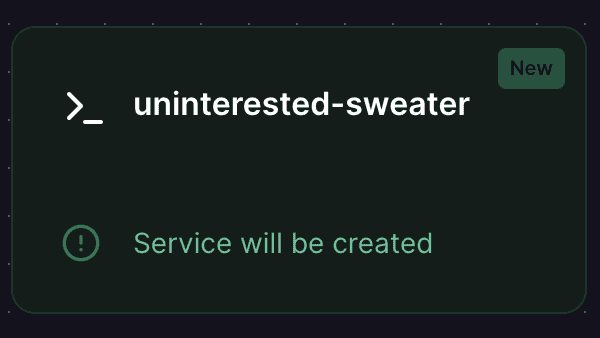
Configure the service we just created
First, start by clicking on the service, and a side will appear. Next, go to the settings tab. We can now change the name of the service (I changed it to Backend).
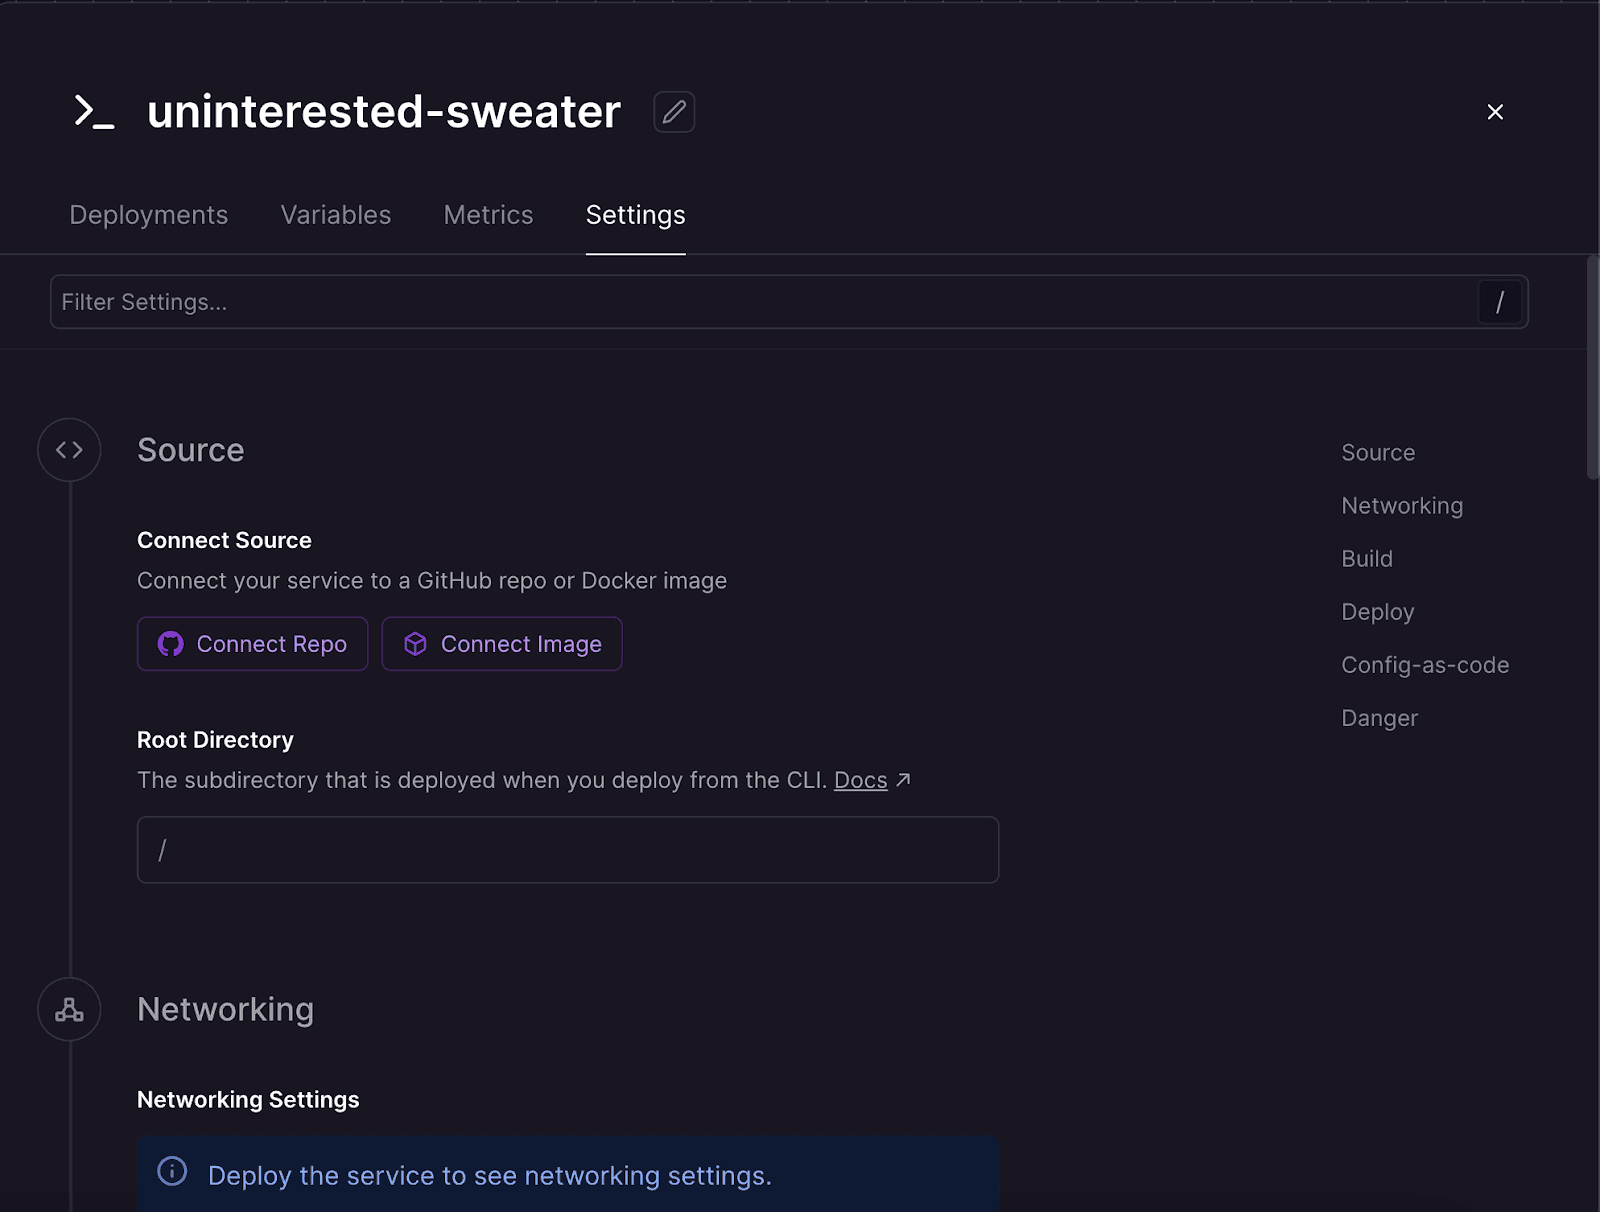
Connect the service to our repository
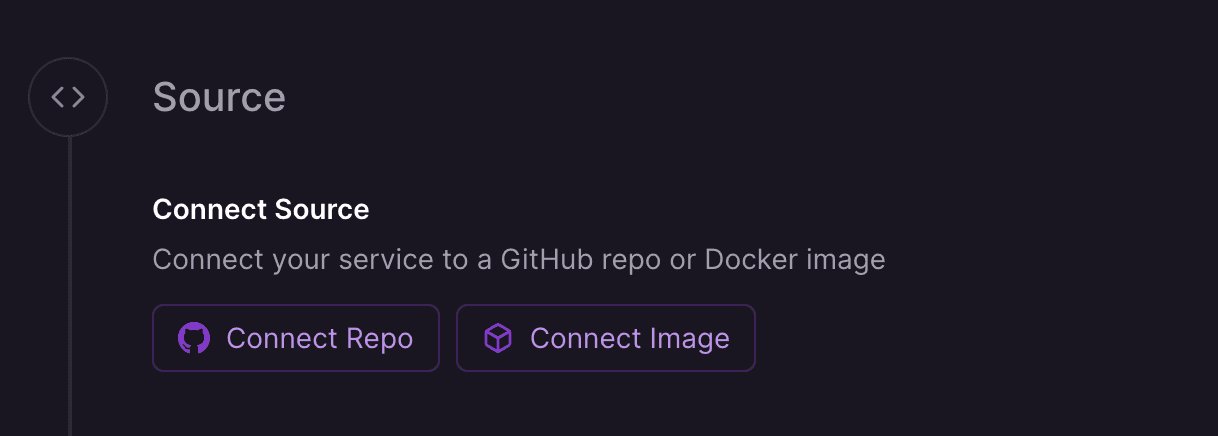
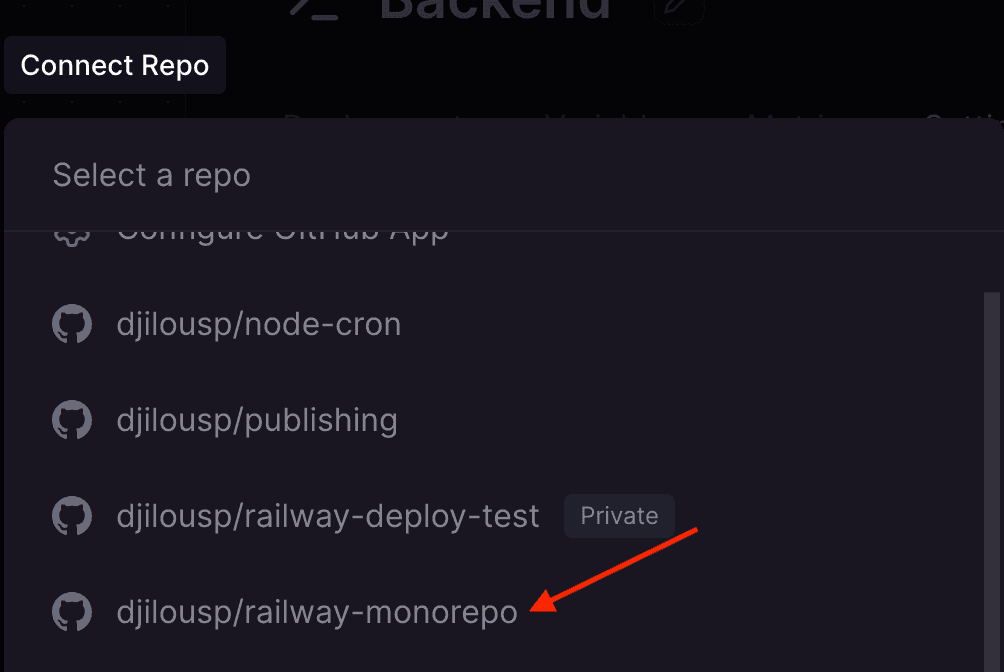
From the source section, click on Connect Repo and select your repository from the dropdown menu:
Select the connected branch as a target
This is done so a new version with the changes will be deployed on each commit. Once done, you might note that the service will fail to build, and that's fine because there are some other settings to set up for our backend to be deployed correctly.
The Root Directory acts like the context the builder (Docker in our case) will use to be the image for our service.
(Note: If this section doesn't appear for you, you will need to click on Add Root Directory and it will be there).

You may notice that I didn't change the root context for this service (the root directory is /packages/backend.
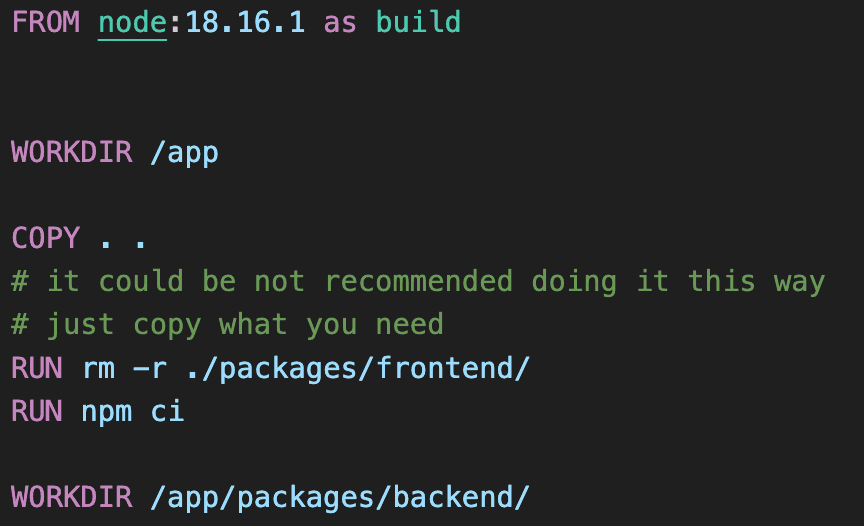
We need other packages to be part of the image ( remember the helper package?) to get everything correct when installing packages from package.json in /packages/backend (using Lerna).
Specify the path
Next we need to specify the path to our railway.json (or railway.toml, I used railway.json in our case).
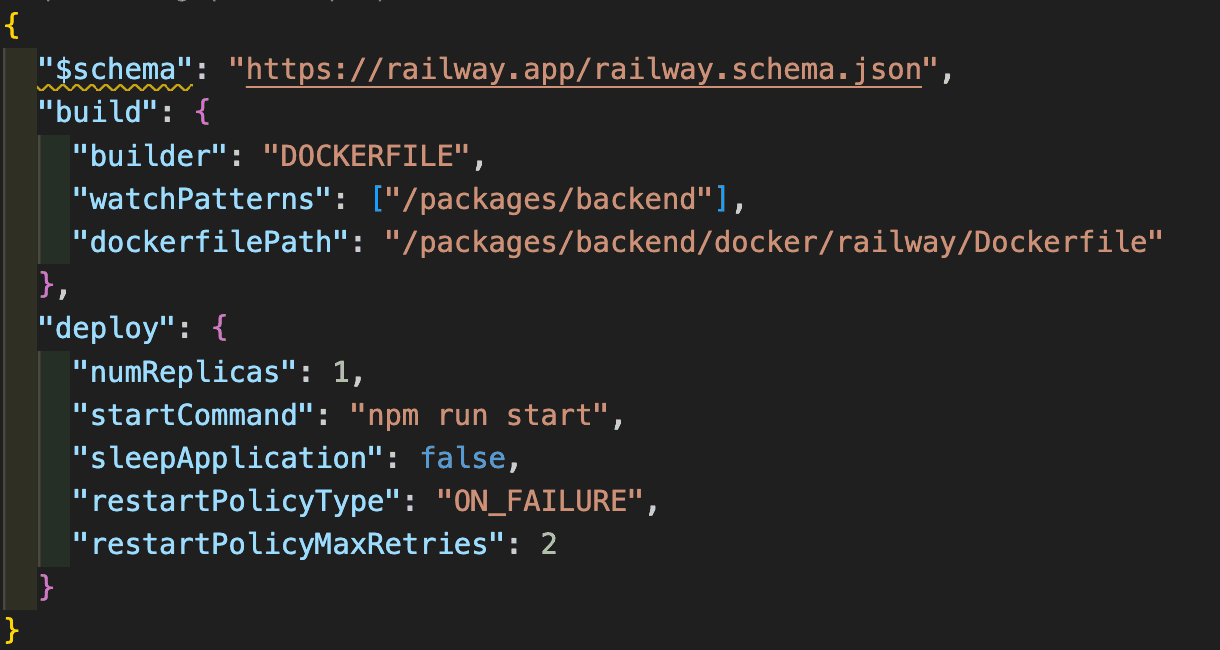
The most two critical pieces of information that we need to make sure they are correctly set in monorepo are:
dockerfilePath: path to the Dockerfile used to build this service
startCommand: command from package.json scripts used to start the app once the build is done.
Once everything is set up and the service is ready. You can click on Generate Domain:
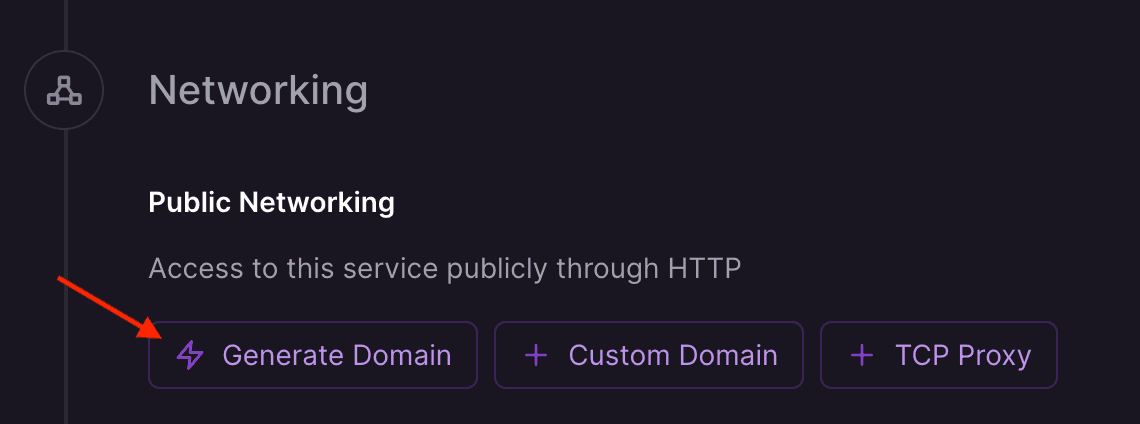
A URL for the service will be generated, and you can access the service publicly.
2.2 Deploy frontend service:
ALL the previous steps are valid and the same when deploying the Frontend service for monorepo.
Once done, you can use the Generated Domain from the Backend service to configure the Frontend to use it.
Step 3. Create a PostgreSQL deployment for the database and Redis for caching (Optional)
The Railway app has a specific component for databases, and you can choose any type of database your service needs.
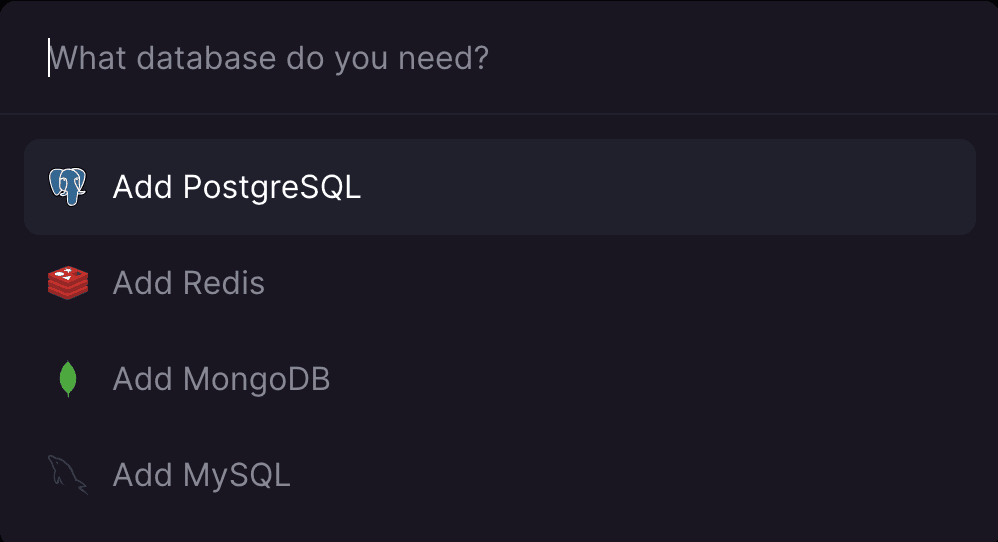
You can then configure your service to use the created database using environment variables in the service's Variables section.
Read: How To Deploy Headless CMS Strapi On Railway App In 7 Steps
Monorepo Considerations
While monorepo offers numerous benefits, they also present some challenges and considerations, particularly regarding scalability and tooling.
Scalability
As the size and complexity of a monorepo grow, managing dependencies and ensuring performance can become challenging. Establishing clear guidelines and workflows is essential to maintain scalability and prevent bottlenecks.
Learning curve
Transitioning to a monorepo structure may require a learning curve for developers accustomed to working with multiple repositories. Providing adequate training and resources can help mitigate this challenge and ensure a smooth transition.
Also read: Top 7 Challenges for Every Software Product Developer
Creating a Template for Future Use
Railway templates serve as predefined configurations that encapsulate the setup and configuration of a specific project or application. These templates streamline the process of creating multiple instances of the same project by eliminating the need to configure each instance from scratch manually.
When you generate a template from an existing project on Railway, you capture its entire configuration, including dependencies, environment variables, and deployment settings.
To generate a template from an existing project in the Railway App, follow these steps:
Navigate to your project
Log in to the Railway app and select the project for which you want to create a template from your monorepo project.
Access settings
Look for the settings or configuration section once you're in the project dashboard. This is typically represented by a gear icon or labeled as "Settings" in the navigation menu.
Find template options
Within the project settings or configuration page, locate the option to create a template. This may be labeled as "Generate Template" or something similar.
Generate template
Click on the "Generate Template" button to initiate the process. The Railway app will then capture the current configuration of your project and package it into a template for future use.
Name and describe the template
Provide a name and description for your template to help identify it later when creating new instances. This step is optional but recommended for organization and clarity.
Save template
Once you've named and described your template, save the changes. Railway will now store the template in your account, ready for future deployments.
By following these steps, you can quickly generate a template from an existing monorepo project in the Railway app and use it to create multiple instances with consistent configurations, saving time and effort in the deployment process.
Also read: Dynamic Routing in Next.js: Tips and Tricks
Important Notes
Before generating templates from monorepo project in the Railway App, it's essential to be aware of certain restrictions and requirements:
Maximum services limit
Railway restricts the number of services allowed per project when generating templates. Currently, you can only create a template from a project that contains a maximum of 5 services. If your project exceeds this limit, you must reduce the number of services before generating the template.
Public GitHub repositories
All services within the project must utilize public GitHub repositories. Railway requires access to these repositories to capture the configuration and dependencies when generating the template accurately. If any services in your project are linked to private repositories, you'll need to make them public or consider alternative deployment options.
By adhering to these requirements, you can ensure a smooth and successful process when generating templates from monorepo projects in the Railway App.
Also read: Custom Domains and SSL with Vercel: A Complete Guide
Conclusion
Deploying a monorepo on the Railway app offers a compelling solution for streamlining development, fostering collaboration, and promoting real-world learning experiences.
By combining the simplicity of the Railway app with the efficiency of a monorepo structure, developers can unlock new levels of productivity and innovation in their projects. Whether for educational purposes or professional endeavors, this integration sets the stage for success in the fast-paced world of software development.
Keep up with Kapsys to learn all about the Railway app and much more!

